|  |
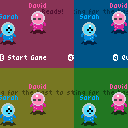
[Starter](../console/quadplay.html?game=quad://examples/starter&IDE=1) is a project with a basic setup
from which you can build your own.
|
|  |
[Hello, World](../console/quadplay.html?game=quad://examples/helloworld&IDE=1) is a minimal example of a program with
one mode, one asset, and no sections or optional elements, and that simply puts text
on the screen.
|
| 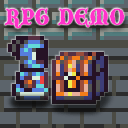 |
[RPG Demo](../console/quadplay.html?game=quad://examples/rpg&IDE=1) is a simple example of a single-player RPG game design:
- Multiple [modes](#modes): Play, Inventory, and Shop
- Multi-layer map
- Player movement with obstructions
- NPC interaction
|
| 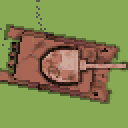 |
[Dual-Stick Example](../console/quadplay.html?game=quad://examples/dual-stick&IDE=1) shows how to use dual-stick controls.
The body of the tank is controlled by player 1 and the turret is controlled by player 2. When
using a dual-stick game controller or keyboard, a single player can also use the right stick
or right side of the keyboard to control the turret.
- Dual-stick controls
- Working with angles
- Entity parenting
- 320x180 resolution
|
| 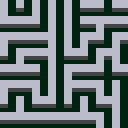 |
[Maze](../console/quadplay.html?game=quad://examples/maze&IDE=1) is a demonstration
of `map_generate_maze()`.
|
| 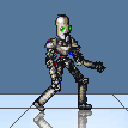 |
[Robot Example](../console/quadplay.html?game=quad://examples/robot&IDE=1) shows how to create and animate a deep
entity hierarchy.
- Entity parenting
- Pivots that are not at the center of sprites
- Using scale and rotation together
- Graphics tricks for reflections
|
|  |
[Animation Example](../console/quadplay.html?game=quad://examples/animation&IDE=1) shows how to handle complicated
sprite animations.
- Sprite animations
- Basic jumping physics
- Changing direction
- Modular items
|
| 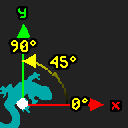 |
[Animation Example](../console/quadplay.html?game=quad://examples/coordinate_system&IDE=1) shows the coordinate
systems produced by changing the default axes.
|
| 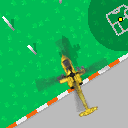 |
[Vehicles Example](../console/quadplay.html?game=quad://examples/vehicles&IDE=1) contains examples of several vehicle controls
from a free-direction top-down perspective.
- 2.5D camera perspective
- Using the ⓔ and ⓕ buttons
- Simple vehicle simulation for control feel
- Entities with moving child parts
- 2.5D sprite stacking
- Dynamic shadows
- Minimap
|
|  |
[Fluid Example](../console/quadplay.html?game=quad://examples/fluid&IDE=1) is a cellular automata fluid flow simulation
with gravity and pressure.
|
|  |
[Roguelike Example](../console/quadplay.html?game=quad://examples/roguelike&IDE=1) uses the roguelike sprite set for tilemap
rendering with a simple text-heavy UI section.
|
|  |
[Dynamic Acceleration Example](../console/quadplay.html?game=quad://examples/dynamic_accel&IDE=1) is a simple demonstration of how various acceleration curves feel, changing only three constants: top speed, acceleration time and deceleration time. Up and down change the constants to fit different games.
|
|  |
[Boids Example](../console/quadplay.html?game=quad://examples/boids&IDE=1) implements the famous ["boids" flocking algorithm](https://en.wikipedia.org/wiki/Boids).
|
|  |
[Clouds Example](../console/quadplay.html?game=quad://examples/clouds&IDE=1) demonstrates per-pixel graphics and multi-octave `noise()` functions. The virtual
GPU is fast enough to process one point per pixel, but this technique is not recommended in general because the computations to produce the points
tend to be too slow, even if this simple.
|
|  |
[A Dark Drive](../console/quadplay.html?game=quad://examples/dark_drive&IDE=1)
A simple horror game jam project using polygon drawing to create darkness
around car headlights.
|
|  |
[Entity Example](../console/quadplay.html?game=quad://examples/entity&IDE=1)
Shows different ways of constructing entities with text and sprites.
|
|  |
[Physics Example](../console/quadplay.html?game=quad://examples/physics&IDE=1) shows all of the features of the
physics engine, including the debugging visualization.
|
|  |
[Physics Example](../console/quadplay.html?game=quad://examples/physics_arrow&IDE=1) shows how to use dynamic
attachments in the physics engine to make objects connect at runtime, and how to simulate aerodynamics so that
arrows will fly straight.
|
|  |
[Text Example](../console/quadplay.html?game=quad://examples/text&IDE=1) shows how to use `replace()`, `draw_text()`, `join()`,
`format_number()`, and `draw_sprite_corner_rect()` to build text-heavy interfaces.
|
|  |
[Font Preview](../console/quadplay.html?game=quad://examples/fontpreview&IDE=1) shows how to render text in various styles
and acts as a tool for previewing fonts when creating new ones. Use the arrow keys to scroll down and see more examples
in the program, and edit the `game.json` file to see a different font.
|
| 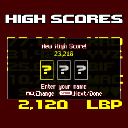 |
[High Score Example](../console/quadplay.html?game=quad://examples/highscore&IDE=1) demonstrates `load_local()` and `save_local()` to
maintain a high score list, with `push_mode()` for creating a popup dialog.
|
|  |
[Vaporwave Example](../console/quadplay.html?game=quad://examples/vaporwave&IDE=1) uses pseudo-3D techniques of pre-rendered
sprites and polygon meshes.
|
| 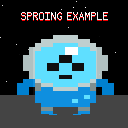 |
[Sproing Example](../console/quadplay.html?game=quad://examples/sproing&IDE=1) shows a squash and stretch effect for transforming sprites.
|
|  |
[Perceptual Color](../console/quadplay.html?game=quad://examples/perceptual_color&IDE=1) shows the difference between `perceptual_lerp_color()` and `lerp()`.
|
| 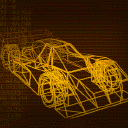 |
[Z-Car Example](../console/quadplay.html?game=quad://examples/zcar&IDE=1) draws a 3D wireframe car using 2.5D graphics
and CRT orange-screen retro phosophor effects.
|
| 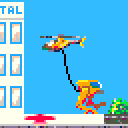 |
[Lift Team](../console/quadplay.html?game=quad://examples/lift_team&IDE=1) combines physics and dynamic constraints for an asymmetric platformer setup, where one
player flies a helicopter that can lift the other player's mech.
|
|  |
[Animated Entity Example](../console/quadplay.html?game=quad://examples/anim_entity_example&IDE=1) Entity
animation example simplified from _Beat The Gobblins_.
|
|  |
[Bezier Eye Creature](../console/quadplay.html?game=quad://examples/bezier_eye_creature&IDE=1) uses splines
to create natural curves for a soft bodied creature.
|
| 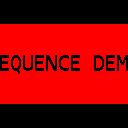 |
[Sequence Demo (transition effect)](../console/quadplay.html?game=quad://examples/sequence_demo&IDE=1)
Shows how to use the sequence function to create a transition effect, which is
factored out into an easy to drop in library. The sequence function lets
choreograph series of frame hooks one after the other.
|
|  |
[Grid Movement](../console/quadplay.html?game=quad://examples/gridmove&IDE=1)
Atari style grid movement with smooth interpolation and wrapping,
similar to PAC-MAN, Centipede, etc.
|
|  |
[Islands](../console/quadplay.html?game=quad://examples/islands&IDE=1) contains optimized implementations
of per-pixel rendering and plausible water and sailboat simulation.
|
| 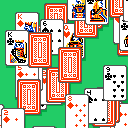 |
[Cards](../console/quadplay.html?game=quad://examples/cards&IDE=1) is an example of creating and manipulating a deck of cards, including `add_frame_hook()` for flipping animations.
|
| 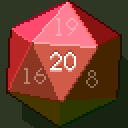 |
[Dice](../console/quadplay.html?game=quad://examples/dice&IDE=1) uses `scripts/dice.pyxl` to show how to make and roll customizable 3D dice for virtual board games.
|
| 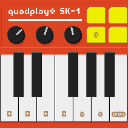 |
[Piano](../console/quadplay.html?game=quad://examples/piano&IDE=1)
Using `pitch` with `play_sound()` to adjust frequency,
and data-driven input testing.
|
|  |
[Spritestack](../console/quadplay.html?game=quad://examples/spritestack&IDE=1)
is a little engine for Grand Theft Auto 2.5D rendering and physics of a 2D game using sprite stacking and camera perspective.
|
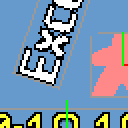
| 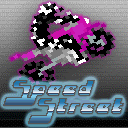 |
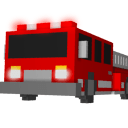
[Speed Street](../console/quadplay.html?game=quad://examples/speedstreet&IDE=1) is the setup for a four-player competitive racing game inspired by [_Excitebike_](https://en.wikipedia.org/wiki/Excitebike) and Tony Hawk games, using:
- Entity hierarchy
- Simple custom physics
- Orthographic 2.5D graphics
- Coordinates with +Y pointing up
- `override_color`
|
| 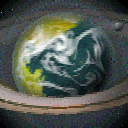 |
[Planet Generator](../console/quadplay.html?game=quad://examples/planetgen&IDE=1) uses built-in assets to create random 3D planets with moons, stars, atmosphere, and rings.
|
|  |
[Change Resolution](../console/quadplay.html?game=quad://examples/change_res&IDE=1) is an example of using `set_screen_size()` to change resolution at runtime.
|
|  |
[Input Example](../console/quadplay.html?game=quad://examples/input&IDE=1) is a demonstration and test
of the full input API. It uses the cross-platform controllers and touch as well as the extended analog
stick and mouse APIs. Shows how to completely hide the OS mouse cursor with `device_control("set_mouse_cursor", "none")`.
|
|  |
[Touch Example](../console/quadplay.html?game=quad://examples/touch&IDE=1) uses the mouse/touch API.
|
|  |
[Countdown Example](../console/quadplay.html?game=quad://examples/countdown&IDE=1) shows how to used `local_time()`
and perform time zone math.
|
| 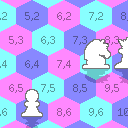 |
[RPG Demo](../console/quadplay.html?game=quad://examples/hex&IDE=1) is an example of hex grids with coordinate
system conversion, rendering, and click support.
|
| 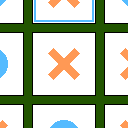 |
[Tic Tac Toe](../console/quadplay.html?game=quad://examples/tic_tac_toe&IDE=1) shows how to take turns,
and mix `gamepad_array`, `touch`, and `device_control("get_mouse_state")` to support
mouseover/hover, touch screen, and gamepads in a single game user interface.
|
| 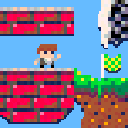 |
[Platformer](../console/quadplay.html?game=quad://examples/platformer&IDE=1) is an example of classic 8-bit platforming physics,
with jump, wall jump, wall slide, short jump, ledge forgiveness, hazards, and variable friction.
|
|  |
[Twin Analog Example](../console/quadplay.html?game=quad://examples/twin_analog&IDE=1) shows how to use `device_control()` to access
twin analog sticks and game controller triggers that are not standard on quadplay consoles.
|
|  |
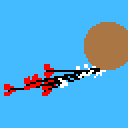
[Kart Example](../console/quadplay.html?game=quad://examples/kart&IDE=1) is a perspective camera
view with a textured ground plane similar to Space Harrier, Mario Kart, and Pilotwings.
|
| 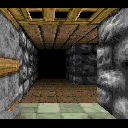 |
[Warlock Example](../console/quadplay.html?game=quad://examples/warlock3D&IDE=1) is 3D first person
rendering similar to DOOM and Heretic, with shading, textured floors and walls, billboarded
characters, pitch and yaw, and jumping. It demonstrates retro D-pad + shoulder button strafe,
quadplay dual D-pad, conventional dual analog, and mouselook controls.
|
|  |
[Word Game](../console/quadplay.html?game=quad://examples/word_game&IDE=1)
Playful use of text and animated level transitions.
|
|  |
[Zoom 2D](../console/quadplay.html?game=quad://examples/zoom2D&IDE=1)
Simplified example of 2D zoom using `set_camera()`.
|
|  |
[Zoom 3D](../console/quadplay.html?game=quad://examples/zoom&IDE=1)
Simplified example of 3D perspective zoom using `set_camera()`. See also the Vehicle example.
|
|  |
[Private Views](../console/quadplay.html?game=quad://examples/private_view&IDE=1)
Private view example for online multiplayer using `set_screen_size()` and
`VIEW_ARRAY`. Also shows how to streamline online game configuration using
`start_guesting()`, `start_hosting()`, and `HOST_CODE`.
|
|  |
[Text Spheres](../console/quadplay.html?game=quad://examples/textspheres&IDE=1)
Sample title screen animation converting text (from a pre-drawn PNG) into
3D shapes for animation.
|
| 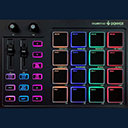 |
[MIDI Starrypad](../console/quadplay.html?game=quad://examples/midi_starrypad&IDE=1)
Example of using the Donner Starrypad physical MIDI controller with ,
with all buttons, knobs, pads, and faders mapped.
|
|  |
[MIDI Launchpad](../console/quadplay.html?game=quad://examples/midi_launchpad&IDE=1)
Example of using the Novation Launchpad physical MIDI controller with
and Sysex messages so that it acts as both an input and output display device.
|
| 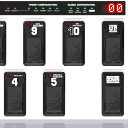 |
[MIDI FCB1010](../console/quadplay.html?game=quad://examples/midi_fcb1010&IDE=1)
Example of using the Behringer FCB1010 physical MIDI controller with
with all default controls mapped.
|
| 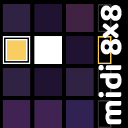 |
[MIDI 8x8 Touch Jam](../console/quadplay.html?game=quad://examples/midi_8x8&IDE=1)
Sample program for a MIDI controller jam, demonstrating the `midi_8x8.pyxl` helper
script.
|
|  |
[Multitouch](../console/quadplay.html?game=quad://examples/multitouch&IDE=1)
Example of `device_control()` for reading multitouch input on touch screens.
|
|  |
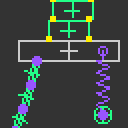
[Bezier Eye Creature](../console/quadplay.html?game=quad://examples/bezier_eye_creature&IDE=1)
Example of a library that uses a simple quadratic bezier + spring system to
simulate bouncy cable/rope/arms.
|
|  |
[Animation Entity Example](../console/quadplay.html?game=quad://examples/anim_entity_example&IDE=1)
By way of an anim entity library, demonstrates how to read sprite frame timing
from a sprite sheet authored in aseprite.
|
|  |
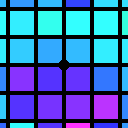
[Color Wheel](../console/quadplay.html?game=quad://examples/color_wheel&IDE=1)
shows the difference between `hsv()` and `artist_hsv_to_rgb()` hues
and brightnesses.
|
|  |
[Fill Window](../console/quadplay.html?game=quad://examples/match_display_aspect&IDE=1)
shows how to perform continuous resolution changes to fill the OS window and match its aspect ratio using
`screen_lib.pyxl`.
|
|  |
[GUI](../console/quadplay.html?game=quad://examples/gui&IDE=1)
uses `cursor_lib.pyxl` to create buttons and scrollboxes for interaction under any
input device.
|
### Inspiration
Some games that were not made in
- [TowerFall Ascension](http://www.towerfall-game.com/)
- [Crawl](https://www.powerhoof.com/crawl/)
- [Nuclear Throne](http://nuclearthrone.com/)
- [Celeste](http://www.celestegame.com/)
- [Undertale](https://undertale.com/)
- [Monolith](https://store.steampowered.com/app/603960/Monolith/)
- [Crypt of the Necrodancer](https://store.steampowered.com/app/247080/Crypt_of_the_NecroDancer/)
- [Shovel Knight](https://yachtclubgames.com/shovel-knight/)
- [Sonic Mania](https://www.sega.com/games/sonicmania)
- [Spelunky Classic](https://spelunkyworld.com/original.html)
- [Dwarf Fortress](http://www.bay12games.com/dwarves/)
- [Contra]("https://en.wikipedia.org/wiki/Contra_(video_game)")
- [Super Contra](https://en.wikipedia.org/wiki/Super_Contra)
- [Kirby's Adventure](https://en.wikipedia.org/wiki/Kirby%27s_Adventure)
- [Gradius](https://en.wikipedia.org/wiki/Gradius)
- [Life Force](https://youtu.be/lgfTC3UVCVs)
- [Gradius II](https://en.wikipedia.org/wiki/Gradius_II)
- [Gradius III](https://en.wikipedia.org/wiki/Gradius_III)
- [River City Ransom](https://en.wikipedia.org/wiki/River_City_Ransom)
- [Double Dragon]("https://en.wikipedia.org/wiki/Double_Dragon_(video_game)")
- [Super Double Dragon](https://en.wikipedia.org/wiki/Super_Double_Dragon)
- [Castlevania II](https://en.wikipedia.org/wiki/Castlevania_II:_Simon%27s_Quest)
- [Castlevania III](https://en.wikipedia.org/wiki/Castlevania_III:_Dracula%27s_Curse)
- [Castlevania: Symphony of the Night](https://en.wikipedia.org/wiki/Castlevania:_Symphony_of_the_Night)
- [Castlevania: Aria of Sorrow](https://en.wikipedia.org/wiki/Castlevania:_Aria_of_Sorrow)
- [Castlevania: Dawn of Sorrow](https://en.wikipedia.org/wiki/Castlevania:_Dawn_of_Sorrow)
- [Advance Wars](https://en.wikipedia.org/wiki/Advance_Wars)
- [Advance Wars Dual Strike](https://en.wikipedia.org/wiki/Advance_Wars:_Dual_Strike)
- [Out Run](https://en.wikipedia.org/wiki/Out_Run)
- [Dig Dug](https://en.wikipedia.org/wiki/Dig_Dug)
- [Batman](https://en.wikipedia.org/wiki/Batman:_The_Video_Game)
- [Tetris](https://en.wikipedia.org/wiki/Tetris)
- [Blades of Steel](https://en.wikipedia.org/wiki/Blades_of_Steel)
- [Pac-Man](https://en.wikipedia.org/wiki/Pac-Man)
- [PGA Tour Golf](https://en.wikipedia.org/wiki/PGA_Tour_Golf)
- [Lode Runner](https://en.wikipedia.org/wiki/Lode_Runner)
- [Star Fox](https://en.wikipedia.org/wiki/Star_Fox)
- [Metroid](https://en.wikipedia.org/wiki/Metroid)
- [The Legend of Zelda]("https://en.wikipedia.org/wiki/The_Legend_of_Zelda_(video_game)")
- [Zelda II: The Adventure of Link](https://en.wikipedia.org/wiki/Zelda_II:_The_Adventure_of_Link)
- [The Legend of Zelda: Link's Awakening](https://en.wikipedia.org/wiki/The_Legend_of_Zelda:_Link%27s_Awakening)
- [The Legend of Zelda: A Link to the Past](https://en.wikipedia.org/wiki/The_Legend_of_Zelda:_A_Link_to_the_Past)
- [Mega Man 2](https://en.wikipedia.org/wiki/Mega_Man_2)
- [Super Mario Bros.](https://en.wikipedia.org/wiki/Super_Mario_Bros.)
- [Super Mario Bros. 2](https://en.wikipedia.org/wiki/Super_Mario_Bros._2)
- [Super Mario Bros. 3](https://en.wikipedia.org/wiki/Super_Mario_Bros._3)
- [Rogue]("https://en.wikipedia.org/wiki/Rogue_(video_game)")
- [NetHack](https://en.wikipedia.org/wiki/NetHack)
- [Snake]("https://en.wikipedia.org/wiki/Snake_(video_game_genre)")
- [Minit](https://store.steampowered.com/app/609490/Minit/)
- [Chasm](https://bitkidinc.itch.io/chasm)
- [Eliminator Boat Duel](https://www.youtube.com/watch?v=NM7ZNX0GUBI)
- [The Eternal Castle](http://www.theeternalcastle.net/)
- [DOOM]("https://en.wikipedia.org/wiki/Doom_(1993_video_game)")
- [DOOM II](https://en.wikipedia.org/wiki/Doom_II)
- [Heretic]("https://en.wikipedia.org/wiki/Heretic_(video_game)")
- [Dark Forces](https://en.wikipedia.org/wiki/Star_Wars:_Dark_Forces)
- [Marathon]("https://en.wikipedia.org/wiki/Marathon_(video_game)")
- [Ultima Underworld](https://en.wikipedia.org/wiki/Ultima_Underworld:_The_Stygian_Abyss)
- [Loom]("https://en.wikipedia.org/wiki/Loom_(video_game)")
- [Day of the Tentacle](https://en.wikipedia.org/wiki/Day_of_the_Tentacle)
- [Pilotwings]("https://en.wikipedia.org/wiki/Pilotwings_(video_game)")
- [Super Mario Kart](https://en.wikipedia.org/wiki/Super_Mario_Kart)
- [Sonic Drift](https://en.wikipedia.org/wiki/Sonic_Drift)
- [F-Zero]("https://en.wikipedia.org/wiki/F-Zero_(video_game)")
- [Space Harrier](https://en.wikipedia.org/wiki/Space_Harrier)
These are games that would fit the restrictions of