**FCB1010 as a DAW MIDI Controller**
Published 2023-06-22; Updated 2025-01-23
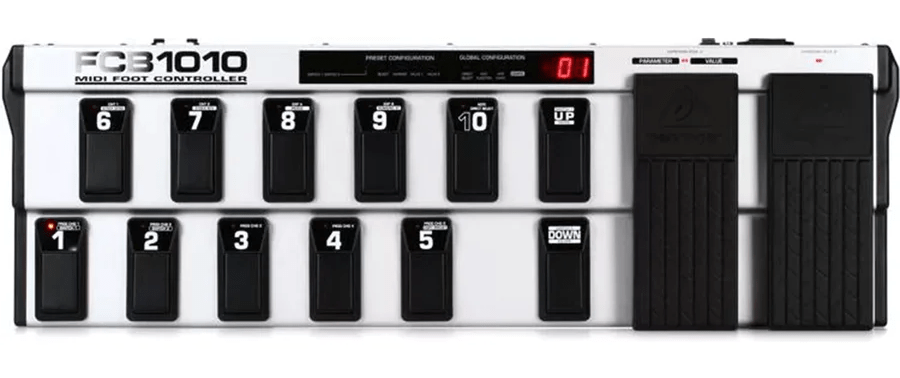
The [Behringer FCB1010](https://amzn.to/42WnlWI) is a very robust,
high functionality MIDI foot controller and has long been the best
option costing less than US$200 for that role. It effectively provides
100 configurable buttons and two expression pedals that can be mapped
to any function in a DAW or synth.
However, it is also an ancient and confusing device by modern
technology standards. It has a very old school programming mechanism
(which you can fortunately ignore for DAWs), terminology that is very
confusing when employed as a generic MIDI controller, and some strange
limitations because of its original use.
If you find working with older hardware entertaining and like how much
value you'll get for the price, then that is part of the charm of this
device. If you do not, then buy a modern and more expensive foot
controller to save yourself the pain. I've never used them, but the
Singular Sound MIDI Maestro and Yamaha MFC10 both look great. The
Roland FC-300 looks like a more expensive version of the FCB1010 with
fewer explicit buttons.
I wrote this article to save you the hours of reading multiple manuals,
watching videos, installing software, and experimenting with the
device that it took me to understand and configure it.
See also the [original manual](https://mediadl.musictribe.com/media/PLM/data/docs/P0089/FCB1010_P0089_M_EN.pdf) for the FCB1010.
!!! Note Custom Firmware
Note that there is [custom firmware](https://www.fcb1010.eu/) for FCB1010 that
you can use to extend its functionality. The largest advantages of
this are making the Up/Down pedals general purpose programmable, turning the
lights into stompbox style toggles per-pedal instead of showing the last-pressed
pedal, and reconfiguring any buttons for sustain (momentary) mode instead of toggle
mode. These are all great features and I'd like to have them. However, I haven't
replaced my own device's firmware. Because there's been some handoffs
of ownership 2023-2025 of this unofficial firmware and I don't want to get stuck
(or deal with some of the configuration programming, which is very confusing and hardcore!)
A secondary reason is that keeping factory
firmware makes it easier for me to configure MIDI software that will
work for others with new, "out of the box" devices.
Initial Setup
=================================================================
1. Open the FCB1010 by removing the 10 screws around the border and
the six in the center (the other three can be left).
2. Check the label on the firmware chip. Version 2.5 is the latest
as of June 2023. This version shipped in 2017, but some new units
still have out of date and buggy firmware. If you bought a used
unit, then it may have unsupported third party replacement chips as well.
3. If you do not have the latest firmware, buy the latest chip (about
$5) and carefully replace the one in the device.
4. If not using the with a 120V North American plug, check the fuse
position as described in the manual.
5. Buy a MIDI-to-USB adapter, because FCB1010 doesn't have one. I use
[FORE MIDI-to-USB adapter](https://amzn.to/3C96dlI), which works as
expected except that the MIDI IN male plug connects to the MIDI OUT
port on the device, and vice versa.
6. If you bought a used device, reset to the factory default configuration by
booting the device with buttons 1 and 6 both held and continuing to hold
them until the countdown LED timer hits zero.
7. Calibrate the expression pedals by:
1. Boot the device with buttons 1 and 5 held. The number
LEDs will display FE and the Value 1 LED and Pedal A LED
will be lit.
2. Move Pedal A to the lowest value. Press the Up button. The Value
1 LED will turn off and the Value 2 LED will light.
3. Move Pedal A to the highest value. Press the Up button. The Pedal A LED and Value 2
LEDs will turn off. The Pedal B and Value 1 LEDs will light.
4. Move Pedal B to the lowest value. Press the Up button. The Value
1 LED will turn off and the Value 2 LED will light.
5. Move Pedal A to the highest value. Press the Up button. The unit
will reboot.
Mental Model
=================================================================
Today the FCB1010 is often used as a generic MIDI foot controller for
triggering synth or DAW functions. However, to make sense of it, you
have to think about its original intended use 20 years ago.
Obsolete Preset Paradigm
-----------------------------------------------------------------
The FCB1010 was designed as a way to control Behringer guitar
amplifiers and effect units that have two binary switch inputs, two
expression pedal MIDI control change inputs, and multiple modes
affected by MIDI program change messages.
For example, you might have a distortion effect device, a reverb
device, and the volume of an amplifier that you want to simultaneously
change to new values between the verse, chorus, and solo sections of a
song. Each of those song parts is one "preset" configuration for your
devices.
The FCB1010 will change _all_ of the devices simultaneously when the
corresponding preset is selected. This means that you do not have to
change multiple settings on multiple devices manually as you move
through each part of the song.
In this context, the function of the FCB1010 is for selecting one of
100 preset configurations for controlling these other devices. Each
preset contains settings for the state of the two switches, Program
Change messages to send to up to five other devices, and expression
pedal ranges to be used within that preset configuration.
To make the presets easily addressable from a relatively small number
of buttons, they are organized into 10 banks of 10 presets.
From this perspective, it is also clear why Behringer has never
updated the FCB1010 with a USB port. It is designed to work with
actual traditional MIDI devices and guitar-cord footswitch inputs. A
USB port would just increase the cost but not help with those devices,
which themselves lack USB ports.
Modern DAW Paradigm
---------------------------------------------------------------
Because it is highly configurable, the FCB1010 can be used far beyond
its original presumable intended use. However, the terminology and
display LEDs are potentially confusing because they are still tied
to the old switching preset model.
The FCB1010 has 10 *banks*. Within each bank, there are 10 macros
called *presets* that are triggered by the buttons, and 2 *expression
pedals* that send Control Change messages.
A *preset* is a sequence of MIDI messages sent when a button is
pressed. By default, the buttons send one Program Change message
each. They can be configured for sending individual Program Change
messages to 5 devices, plus two control change messages, plus one note
message, plus change the binary status of each of two external switch
values, plus changing the range and controller number of the expression
pedals. When a foot button is pressed, all eight of these messages are
sent if they are configured.
The FCB1010 can be used with a DAW by entering MIDI mapping mode on
the DAW, selecting a bank, and then pressing the button for a desired
command.
An artifact of the device's origin is that the last button pressed
will remain lit, and will affect the functioning of the expression
pedals unless you explicitly configure them to operate the same
following each pedal. There are several alternative firmware chips
that you can buy to remove these traditional limitations. See
https://www.fcb1010.eu for information on the most popular ones.
The FCB1010 stores the preset configurations in non-volatile memory,
so that they persist when power is removed.
There are two ways to activate a preset:
2. *Direct Select* Off: Scroll through banks with the up/down
buttons. The number LEDs shows the bank number as 00
through 09. The Direct Select LED is not lit. When a preset button
is pressed, its LED lights up and all other preset LEDs go dark.
1. *Direct Select* On: Every entry is two single-digit button
presses. The first press is the number of the bank, and the second
is the preset. The number LEDs show the bank and preset numbers as
00 through 99. The Direct Select LED is lit.
The initial mode is Direct Select Off. This is indicated by the Direct Select
LED not being illuminated. Toggle between these modes by:
1. Boot the device with the Down button held
2. Release Down
3. Press 10
4. Hold Down for 3 seconds
This setting persists when powered off.
Configuring
==========================================================================
You do not need to configure the FCB1010 to work with a DAW or synth
that has MIDI learning...unless your DAW, like Ableton, does not
accept the generic Program Change messages that FCB1010 sends out of
the box and instead needs Control Change and Note messages. You would
also need to configure it if working with a device that expects
_specific_ MIDI messages as inputs.
The easy way to configure it is by using 3rd party software that sends SysEx
messages. The
[Mountain Utilities FCB1010 Manager](https://mountainutilities.eu/fcb1010)
is a frequently updated free utility for programming the FCB1010
specficially that runs on both macOS and Windows. It has its own
[PDF manual](https://mountainutilities.eu/system/files/download/fcb1010-manager-manual-2.2.4.pdf).
[This video](https://www.youtube.com/watch?v=MMJQ-AHRSMs) explains how
to use the Manager program, or you can use my standard configuration
from the Ableton via Mountain section.
If you don't want to use SysEx or are working without a computer,
then you can configure the hard way. That is to navigate a set of
on-device menus by a complex series of taps on foot buttons.
The FCB1010 has a menu system described by flow charts
as described in the
[PDF manual](https://mediadl.musictribe.com/media/PLM/data/docs/P0089/FCB1010_P0089_M_EN.pdf),
which is _not_ the manual that ships with the device.
Holding the Down button for a few seconds enters and exits the menu.
[This video](https://www.youtube.com/watch?v=SYNND5nMWhc) explains the
programming as well.
[Another video](https://www.youtube.com/watch?v=wO3XD_HU-tE) walks
through specifically configuring FCB1010 for Ableton.
Ableton Configuration via Mountain
=================================================================
To configure the FCB1010 via the
[Mountain Utilities FCB1010 Manager](https://mountainutilities.eu/fcb1010)
for [Ableton Live](https://www.ableton.com/en/live/):
1. Install the [Manager](https://mountainutilities.eu/fcb1010)
2. Close all other MIDI programs
3. Power off the FCB1010
4. *Disconnect the port labelled MIDI In* _on the FCB1010_ (not the device's out port that goes
to your adapter's MIDI In)
5. Run the Manager software
6. Press the red MIDI port icon on the Manager. It will bring up a dialog
explaining the following steps.
7. Hold down the Down pedal and power up the FCB1010 with it held down
8. After the green Direct Select LED lights up, release the Down button
9. Tap the Down button. The green Config LED will now light up
10. Tap the 6 pedal
11. Press OK on the dialog that appears. You will now be looking at
the current state of your FCB1010 in the Manager
12. In the Manager, press the Show Presets grid icon, and then map the buttons as
shown in the table below using the editor, or just load them from my
[config file](fcb1010-ableton.syx download).
13. Press the green MIDI icon to send this configuration to the device, which
will then tell you to complete the following steps in a dialog.
14. Connect the MIDI In port to your cable's MIDI Out (this is what you
previously disconnected)
15. Tap the 7 pedal
16. Look at the green Config LED on the device and
press OK on the dialog in the Manager
16. Wait for a while. You will see the Config LED go out and then
come back on.
17. Press and hold the Down pedal for 3 seconds to save. The
Red LED numbers will count down and then show 00 when done.
You have then now commited the new configuration.
18. You can now power off the FCB and disconnect the MIDI In
port, which you don't need for normal operation.
You should now be able to use the FCB1010 in Ableton MIDI mapping mode
in the same way as any other device.
Preset | SW 1 | SW 2 | PC 1 | PC 2 | PC 3 | CNT 1 | Val 1 | CNT 2 | Val 2 | PC 5 | NOTE | Exp A | Min A | Max A | EXP B | Min B | Max B
-------|------|------|------|------|------|-------|-------|-------|-------|------|------|-------|-------|-------|-------|-------|-------
0:1 | | | | | | 127 | 127 | | | | 0 |27 |0 |127 | 28 | 0 | 127
0:2 | | | | | | 127 | 127 | | | | 1 |27 |0 |127 | 28 | 0 | 127
0:3 | | | | | | 127 | 127 | | | | 2 |27 |0 |127 | 28 | 0 | 127
0:4 | | | | | | 127 | 127 | | | | 3 |27 |0 |127 | 28 | 0 | 127
0:5 | | | | | | 127 | 127 | | | | 4 |27 |0 |127 | 28 | 0 | 127
0:6 | | | | | | 127 | 127 | | | | 5 |27 |0 |127 | 28 | 0 | 127
0:7 | | | | | | 127 | 127 | | | | 6 |27 |0 |127 | 28 | 0 | 127
0:8 | | | | | | 127 | 127 | | | | 7 |27 |0 |127 | 28 | 0 | 127
0:9 | | | | | | 127 | 127 | | | | 8 |27 |0 |127 | 28 | 0 | 127
1:10 | | | | | | 127 | 127 | | | | 9 |27 |0 |127 | 28 | 0 | 127
1:1 | | | | | | 22 | 127 | | | | |27 |0 |127 | 28 | 0 | 127
1:2 | | | | | | 23 | 127 | | | | |27 |0 |127 | 28 | 0 | 127
1:3 | | | | | | 24 | 127 | | | | |27 |0 |127 | 28 | 0 | 127
1:4 | | | | | | 25 | 127 | | | | |27 |0 |127 | 28 | 0 | 127
1:5 | | | | | | 26 | 127 | | | | |27 |0 |127 | 28 | 0 | 127
1:6 | | | | | | 29 | 127 | | | | |27 |0 |127 | 28 | 0 | 127
1:7 | | | | | | 30 | 127 | | | | |27 |0 |127 | 28 | 0 | 127
1:8 | | | | | | 31 | 127 | | | | |27 |0 |127 | 28 | 0 | 127
1:9 | | | | | | 84 | 127 | | | | |27 |0 |127 | 28 | 0 | 127
1:10 | | | | | | 85 | 127 | | | | |27 |0 |127 | 28 | 0 | 127
In the table, I made bank 0 store toggle switches (which is usually
what I want to map in Ableton, such as turning a guitar effect on and
off like a stomp box), and bank 1 store momentary controls (which is
not as useful in a DAW since FCB cannot separate press and release
with default firmware).
I left EXP A on CC27, which is the default for it, but changed EXP B
to CC28 since Ableton only recognizes CC22 through CC31 and CC84
through CC90 (I have no idea why).
In the FCB/MIDI jargon, the abbreviations for the columns mean:
SW
: Switch. Mapping to a switch on an amplifier, for example
PC
: MIDI Program Change message
CNT
: Send a MIDI Control Change message for this channel (which the FCB
calls a "controller", hence the CNT abbreviation). The value entered
is the channel. Historically there were specific controllers
hardcoded, such as 07 = volume, 11 = expression. This is fully remappable in a modern
DAW. Note that for the FCB, CNT 1 is always
transmitted when a NOTE is specified, which is why I set it to the bogus value channel 127
value 127
when also sending a note.
VAL
: The value payload of the MIDI Control Change message.
NOTE
: Send a MIDI Note-On 64 message with the specified note number when
the button is pressed for this preset, and MIDI Note-on 0 when it is
released. The number entered in the table is the MIDI note number
0-127 where 0 is a Scientific Pitch C2 and 127 is G8.
EXP
: Expression pedal's MIDI Control Channel that will be used when this preset
is active.
Min
: Minimum value for the MIDI Control Change message when this preset is active.
Max
: Minimum value for the MIDI Control Change message when this preset is active.
Initial Configuration
=================================================================
- Direct Select = off
- For all banks:
- Pressing a button sends Program Change, 10 x (bank number) + (button number - 1) = 0 through 99
- For all presets:
- Pedal A = Control Change, channel 0, controller 27, value 0 through 127
- Pedal B = Control Change, channel 0, controller 7, value 0 through 127